3.1 Installation Precautions
Refer to the following section for the ambient installation conditions.
■ Installation Near Sources of Heat
Implement measures to prevent temperature increases caused by radiant or convection heat from heat sources so that the ambient temperature of the servo driver meets the ambientconditions.
■ Installation Near Sources of Vibration
Install a vibration absorber on the mounting surface of the servo driver so that the servo driver will not be subjected to vibration.
■ Other Precautions
Do not install the servo driver in a location subject to high temperatures, high humidity, water drops, cutting oil, excessive dust, excessive dirt, excessive iron powder, corrosive gasses, or radioactivity.
|
3.2 Mounting Types and Orientation |
|
|
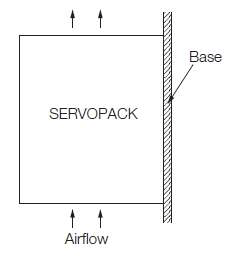
The servo driver only support base-mounted and as shown in the following figure. Also, mount the servo driver so that the front panel is facing toward the operator. NOTE: Prepare two to four mounting holes for the servo driver and mount it securely in the mounting holes. (The number of mounting holes depends on the capacity of the servo driver.) |
|
|
3.3 Mounting Hole Dimensions |
|
|
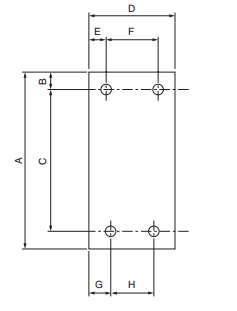
Use mounting holes to securely mount the servo driver to the mounting surface. NOTE: To mount the servo driver, you will need to prepare a screwdriver that is longer than the depth of the servo driver. |
|
3.4 Mounting Interval
Provide the following intervals between the servo drivers and spaces in a control panel.
|

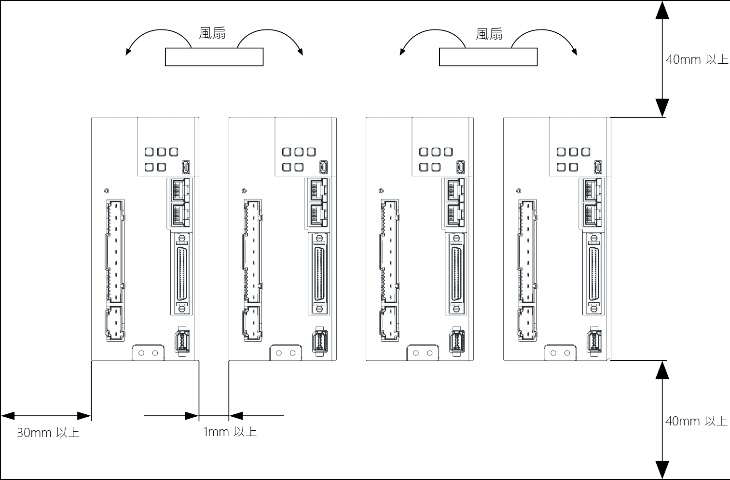
*: The distance of AC220V 03A/06A & AC380V 03A is 1mm.
The distance of others is 10mm.
Tip: press ← → to switch chapters, Ctrl+K to search