This section describes how to open and save the project as well as certain relevant setting in order that the user may quickly control over the method in using the required functions.
4-1 Open a New Project
Create a new project to edit the controller program.
First, click the upper-left [File]  and then click [New], or click the [New] in Quick toolbar, or you may press [Ctrl+N] to open a new project directly.
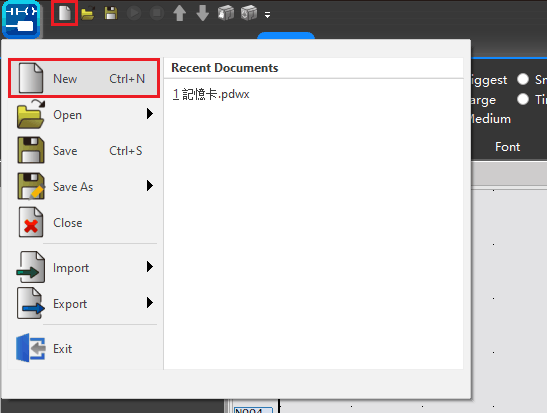
Fig. 25: Open new project
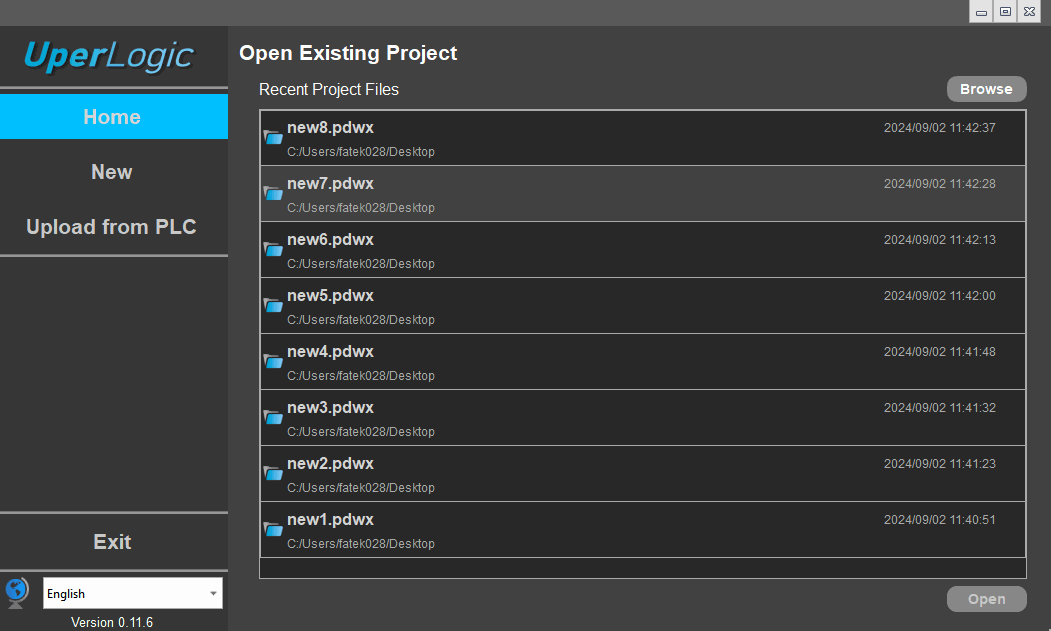
After that, the window appears as per the figure below. Select [NEW] in the left column.
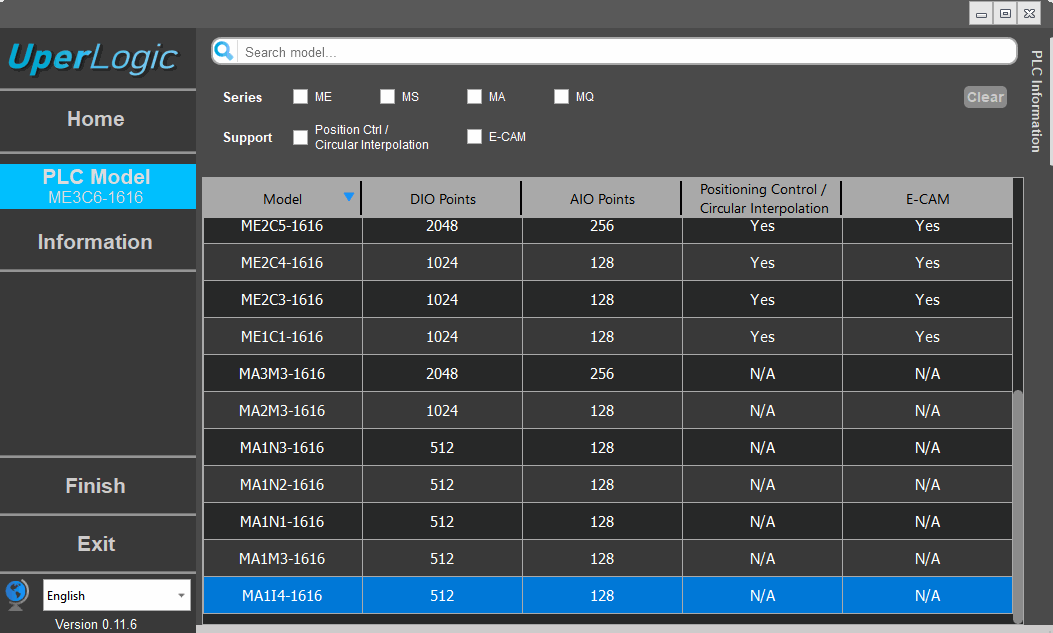
Choose the model that you need. You can click [PLC Information] in the right column to check the PLC detailed information.
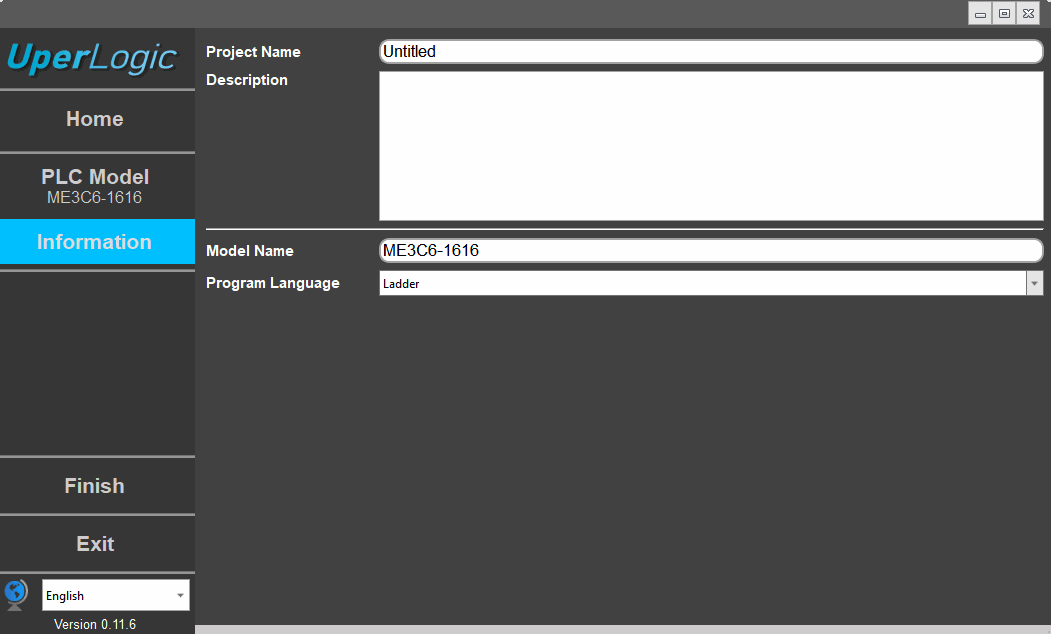
Click Information to complete the setting, and click [Finish] to open the new project..
|
Function |
Description |
|
Series |
Based on the series that will be actually needed, select a corresponding series. |
|
Support |
After selection, models that support this feature will be displayed. |
|
Project Name |
Please define the project name for the convenience of file management in the future. |
|
Description |
The lists the descriptive text relating to the project. |
|
Model Name |
The name of the selected model. |
|
Program Language |
To change the language of the editing project, or can choose to edit through Ladder or ST. |
Table 12: New project opening related setting
4-2 Project Setup
The project can modify and view project information, model, history and capacity by clicking [Project Setup] → [Project Information] on the function bar as shown below:
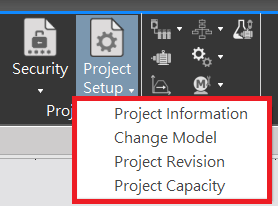
Fig. 27: Project Setup
|
Function |
Description |
|---|---|
|
Project Information |
Please define the project name to facilitate future file management. |
|
Change Module |
Optionally list the explanatory text for this project. |
|
Project Resume |
According to the drop-down list, select a corresponding series according to the series actually used. |
|
Project Capacity |
Display the current project program and data usage. |
4-2-1 Project Information
Click [Project Information] and then the below window appears. Users can edit project name and description through project information.
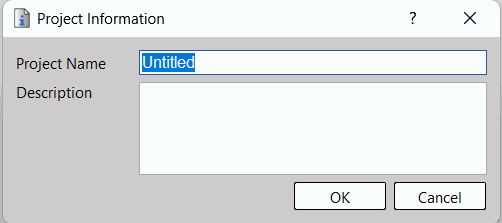
Fig. 28: Project Information
4-2-2 Change Module
Click [Change Model] to see the following screen. Users can select the series and model of the project.
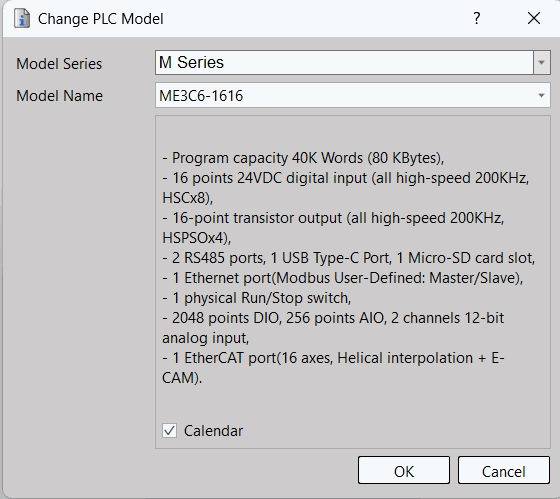
Fig. 29: Change PLC Module
4-2-3 Project Revision
Click [Project History] and you will see the following screen. Users can log in the history and write comments, and then restore the project to the original version when necessary.
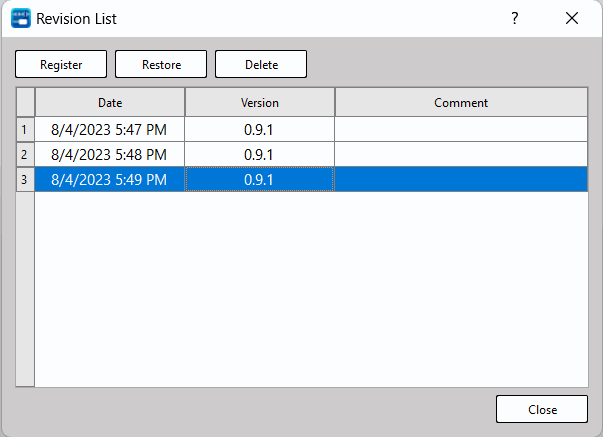
Fig. 30: Revision List
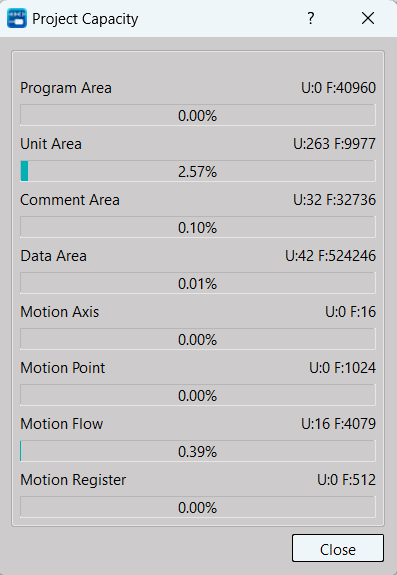
4-2-4 Project Capacity
Click [Project Capacity] and you will see the following screen. Users can clearly know the usage distribution of each part of the project through the bar graph.
4-3 Automatic Project Backup
To protect the newly edited project from losing due to unexpected contingencies, it allows the user to execute the automatic backup related setting action by clicking the [Project] → [Options] → [File] in the tag page.
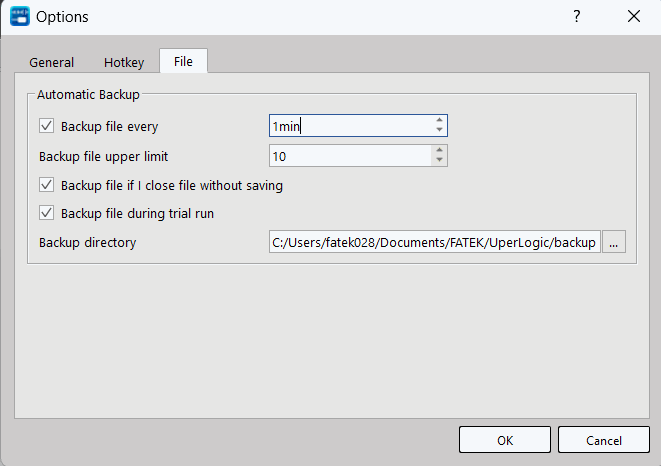
Fig. 31: File Processing
|
Function |
Description |
|
Backup Interval |
Automatically back up projects based on set intervals. The time interval of automatic backup can be set from 1 to 999 minutes, and automatic backup will be enabled when checked. |
|
Backup file limit |
Set the upper limit of automatic backup files for the same project, and the setting range is 1 to 99. For example, if the project file name is “Untitled”, and the file limit is 5, it will be automatically backed up “($autosaved_1) Untitled”, |
|
Backup file if I close file wothour saving |
When the user has edited the project but closes the file without saving, checking this option will automatically back up the current project. For example, if the project file name is “untitled”, “($unsaved) untitled” will be automatically backed up. |
|
Backup files during trial running |
When the user uses the trial run function during online editing, checking this option will automatically back up the current project. For example, if the project file name is “untitled”, “($unsaved) untitled” will be automatically backed up. |
|
Backup Directory |
The location of the above backup files can be set. |
|
Advanced Backup |
When the file version is updated, use the new version program to start the file, and the program will automatically back up the old version of the file to the backup location. For example, the current project file name is “untitled”, the file version is 1009, and the new version of the program is 1011, and “($1)untitled” will be automatically backed up when the project is opened. This function is always enabled, there is no off setting. |
4-4 Save the Project
Click the upper-left [File]  and then click [Save Project] or click [Save project] in Quick toolbar, or you may press [Ctrl+S] key to save the project directly and it is intended to save the project on the disk. You may use such function to save the revised project content on the disk.
4-5 Save a New Project
Click the upper-left “File”  and then click “Save project as.” If change will be required for the content of the opened project, you may save the revised project content as another project name in order to save it on the disk.
You may also point the cursor at [Save As] in the [File] and then the window will show detailed items of the project being newly saved. In the meantime, the [Save As] also comprises the following two modes and they are [Save As] and [Save As to PLC]. Described below is the difference between both.
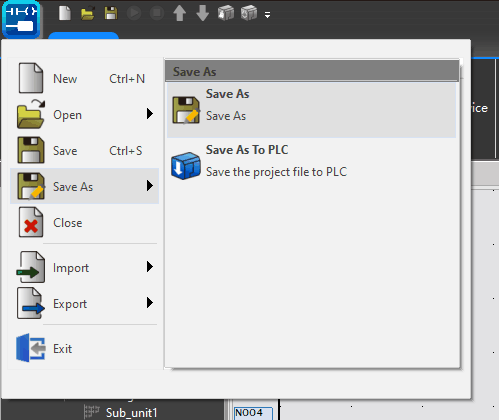
Fig. 32: Saving a new project (Save As)
|
Mode |
Description |
|
Save As |
You may save the revised project content as another project name and then store it on the disk. |
|
Save As To PLC |
Same as [Download], you may download the project to PLC directly after setting up the [Online Parameter]. |
Table 13: Two modes of “Save As”
4-6 Project Content Import and Export
The project content import and export function shall include [Comment], [Ladder Diagram], [Status Page], [Table] and [Motion]. Click [File] → [Export] or [Import] in function toolbar and the desired function will be displayed. Described below are relevant details:
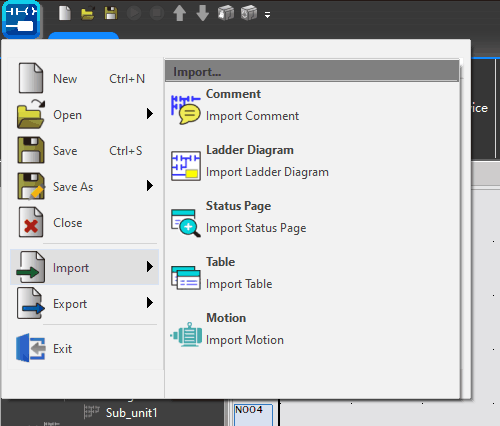
Fig. 33: Project Import
- Comment:
- Export: Click [File] → [Export] → [Comment] in function toolbar and the [Comment Export] window will appear. The exported file is presented in text file format and its sub-file title is coded as “txt.”
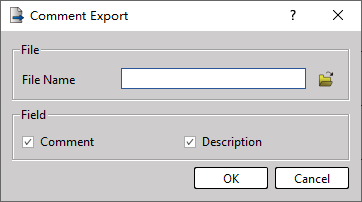
Fig. 34: Comment Export
- Import: If the text file contains the export comment, click [File] → [Import] → [Comment] in function toolbar and the [Comment Import] window will appear. Select text file and then execute the importing procedure:
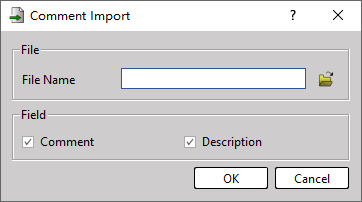
Fig. 35: Comment Import
- Ladder Diagram
- Export: If you need to copy Network N001 of Project-1 to Project-2, execute according to the following step. First, open Project-1 and then highlight Network N001, as per the figure below:

Fig. 36: Highlighting N001
Next, click [ File] → [Export] → [Ladder Diagram] in function toolbar and the [Save As] dialog box will be created. After inputting the file name, press [Save] to complete the exporting procedure.
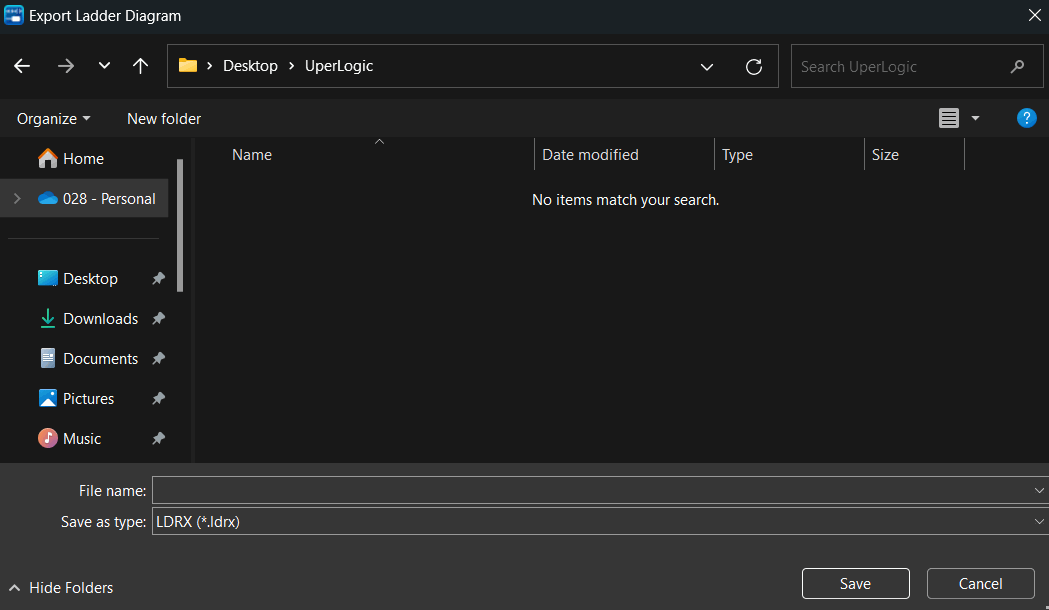
Fig. 37: Exporting Ladder Diagram
- Import: Open the project. Move the cursor to the position where the network will be inserted and then click [File] → [Import] → [Ladder Diagram] in function toolbar:
Select the file to be inserted and then press [Start] to complete the importing procedure.
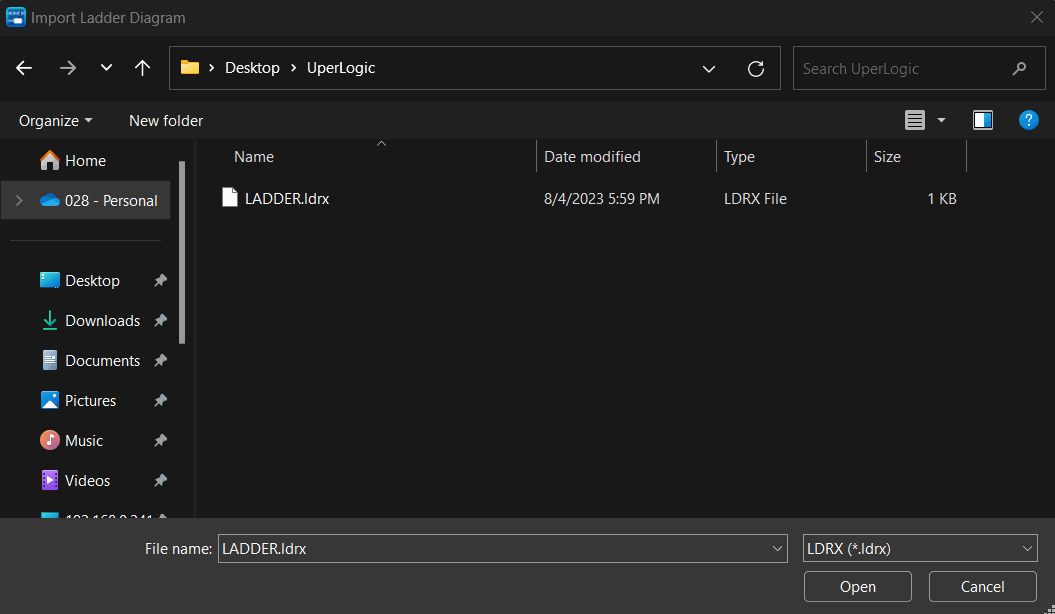
Fig. 38: Importing Ladder Diagram
- Status Page:
- Export: Click [File] → [Export] → [Status Page] in function toolbar and the [Status Page Export] window will appear. In [Status Page List], select “Status Page 1” and then press [Export] button for saving it as “spf” sub-file to complete the Status Page exporting procedure.
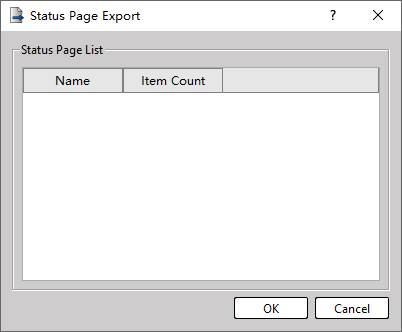
Fig. 39: Status Page Export
- Import: Click [File] → [Import] → [Status Page] in function toolbar and the [Status Page Import] window will appear. Select the file name of the Status Page that will be imported. Click [Status Page] in the list and then press [Import] button to complete the importing procedure. Open the [Status Monitor] window of this project and you will see the newly added Status Page.
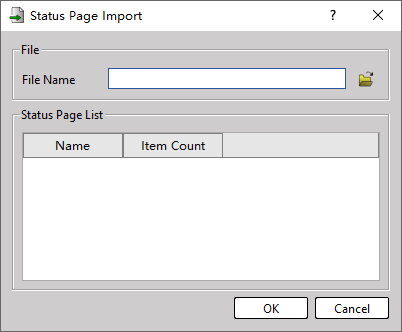
Fig. 40: Status Page Import
- Export Table
- Export: Click [File] → [Export] → [Table] in function toolbar and the [Table Export] window will appear. In [Table List], select the table that will be exported. Press [Export] button and then save it as “tab” sub-file to complete the table exporting procedure.
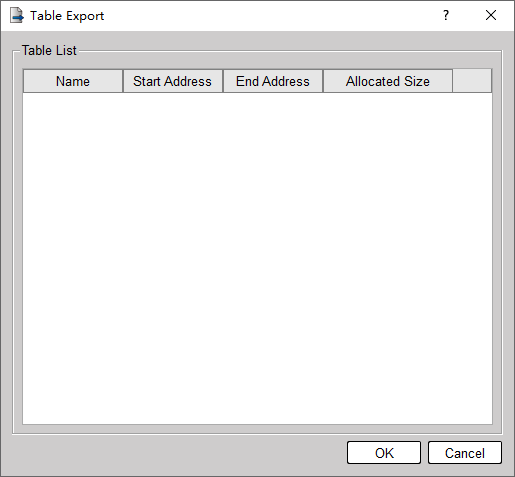
Fig. 41: Table Export
- Import: Click [File] → [Import] → [Table] in function toolbar and the [Table Import] window will appear. In [Table List], select the table that will be exported and then press [OK] button to complete the table importing procedure.
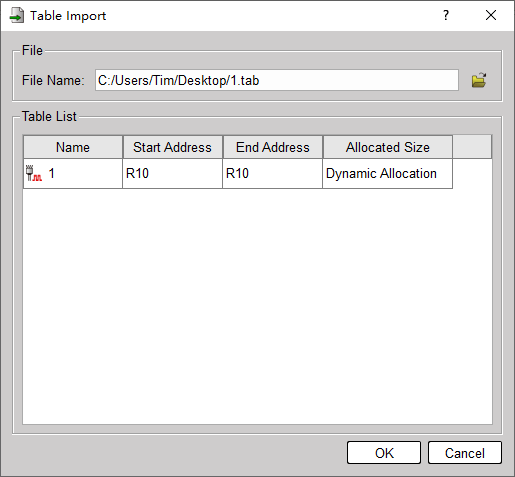
Fig. 42: Table Import
- Motion
- Export: Click [File] → [Export] → [Motion] in function toolbar and the [Motion] window will appear. Press [Export] button and then save it as “.fmprj” sub-file to complete the Motion Control exporting procedure.
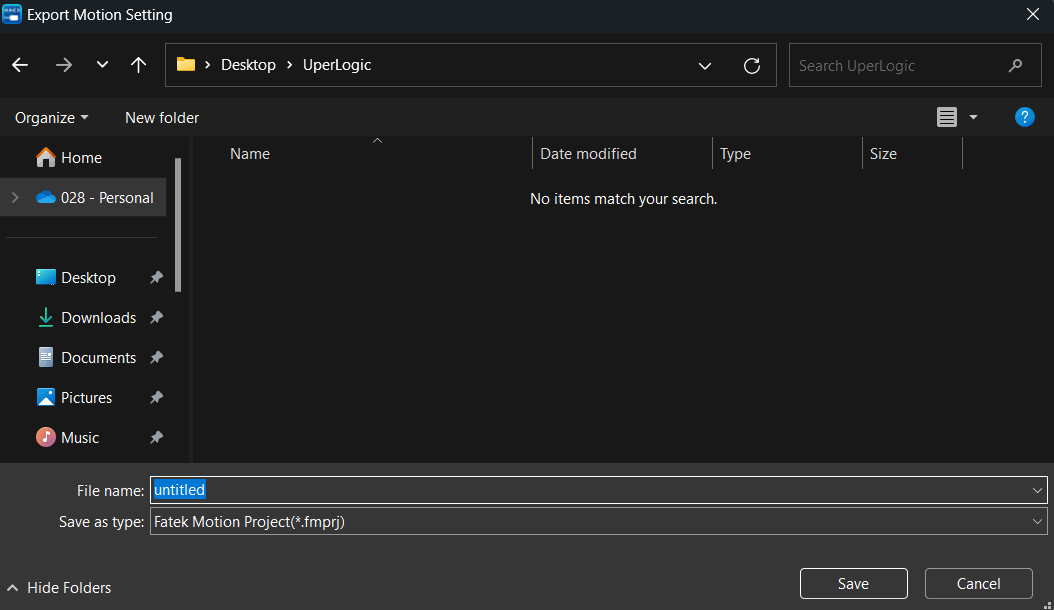
Fig. 43: Exporting Motion
- Import: Click [File] → [Import] → [Motion] in function toolbar and then select the file that will be imported to complete the Motion Control importing procedure.
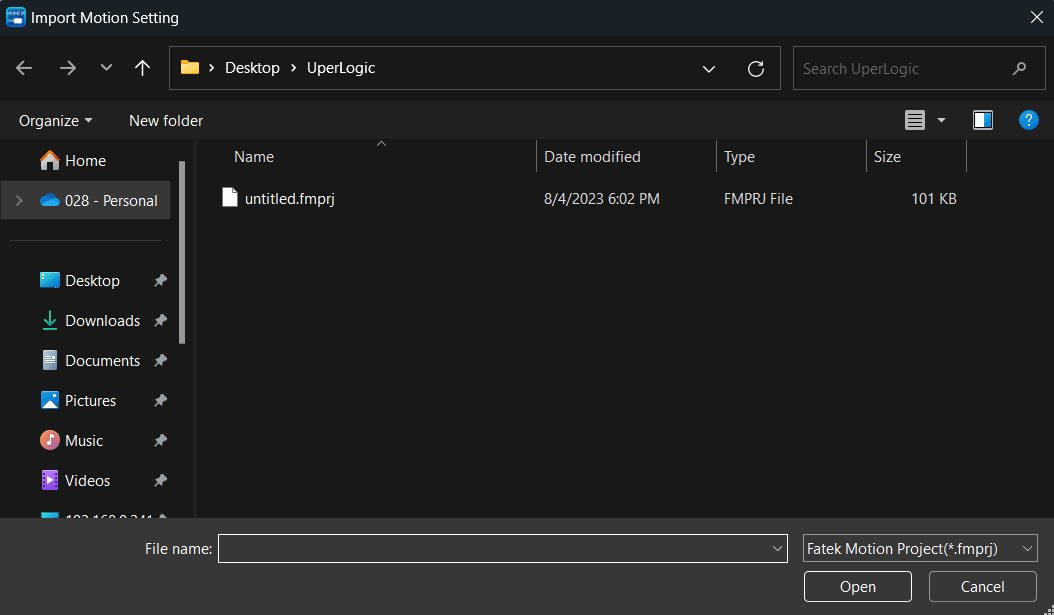
Fig. 44: Importing Motion
4-7 Open Old Projects
Click the upper-left [File]  → [Open] or click [Open] of the quick toolbar and you may open the edited project.
By pointing the cursor at [Open] in [File], the system will display detailed items of the project that will be opened. The project opening can be achieved with any of the following three options: [Open], [Import WinProladder Project] or [Connect To PLC].
With the [Import WinProladder Project], it allows the user to easily convert the project being edited in “WinProladder” to “UperLogic” project for use. By simplifying the complicated rewriting procedure, the efficiency of project conversion is therefore enhanced. Attention should be paid to confirming the project content after conversion, some register definitions and functions are not fully compatible.
Provided below is the detailed description of the aforesaid three options.
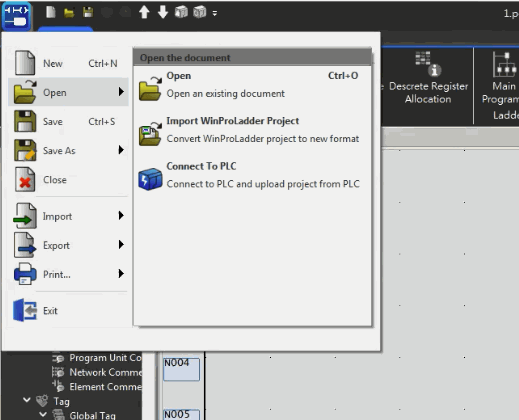
Fig. 45: Open Project
|
Mode |
Description |
|
Open Project (Ctrl+O) |
Open the existing project. |
|
Import WinProladder Project |
Open the project (.pdw) being edited in WinProladder. After being converted, the user needs to confirm the content of the project; however, such function is not fully compatible. |
|
Connect to PLC |
Same as the [Upload] function. After setting up the [Online Parameter], the user will be allowed to read the project from the PLC. |
Table 14: Three modes of Open Project
4-8 Project History
Provides users with the functions of registering, replying, and deleting project revision records, and the project revision records will exist in the project file (*.pdwx). When PLC is in the state of “Offline Editing”, select the tab page [Project] → [Project Settings] → [Project History].
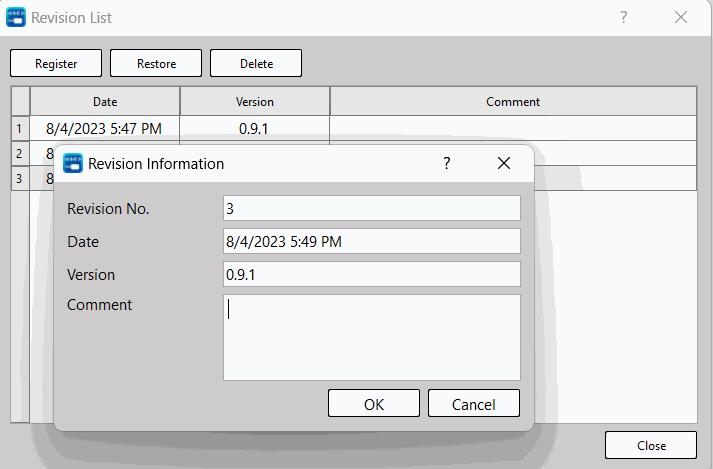
Fig. 46: Project History
|
模式 |
說明 |
|
Login |
After clicking [Login], the log-in window will display the history number, login time, program version and provide users with the option to edit the notes of the history. After confirming, the history will be registered, and the upper limit is 100. If the current project is an unsaved project, the user will be prompted to save the current project. |
|
Restore |
Select the project history you want to restore, click [Restore], and the project will be restored to the state of the history. |
|
Delete |
Select the project history to be deleted, and click [Delete] to delete the history. |
4-9 Print
The function of print includes [Print…], [Print RTF File], [Print Setup]. Click the upper-left [File] → [Print].
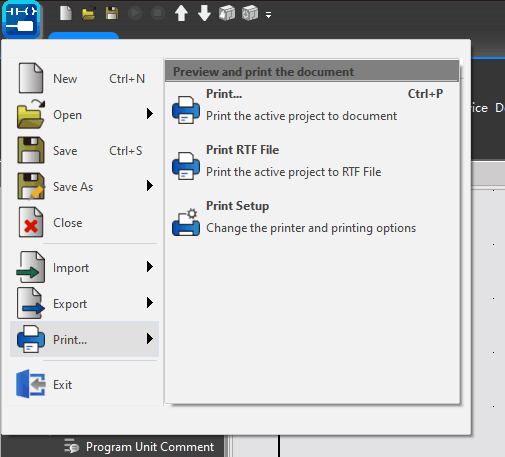
Fig. 47: Print
|
Mode |
Description |
|
Print…. |
Set the format to be printed and the content to be printed |
|
Print RTF File |
The selected print file will be converted into RTF format |
|
Print Setup |
You can modify the related settings of the printer |
Table 14: The three modes of Print
4-9-1 Print…
After clicking [Print…] or press [Ctrl+P], the screen will be shown as below. Users can select the items which they want to print. And use [Move UP] or [Move Down] to change the display order. Users can also use the right-side function [Preview], [Page Setup], [Printer Setup] for setting.
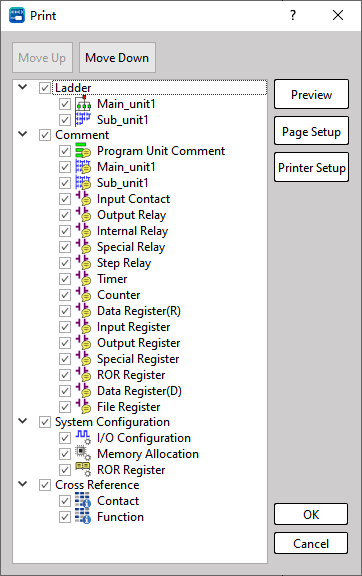
Fig. 48: Print
[Preview]:
Users can preview the completed print through “Print Preview”.
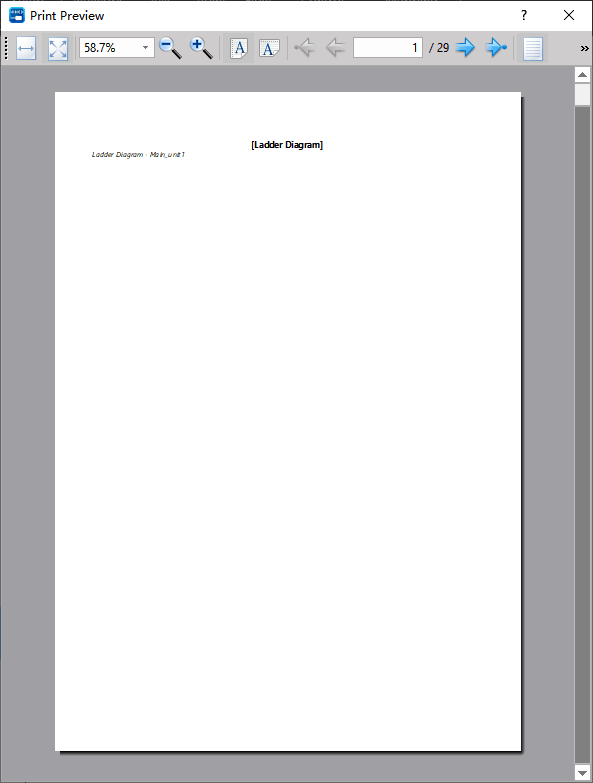
Fig. 49: Print Preview
[Page Setup]:
Users can modify related settings such as paper size, orientation, and borders through [Page Setup].
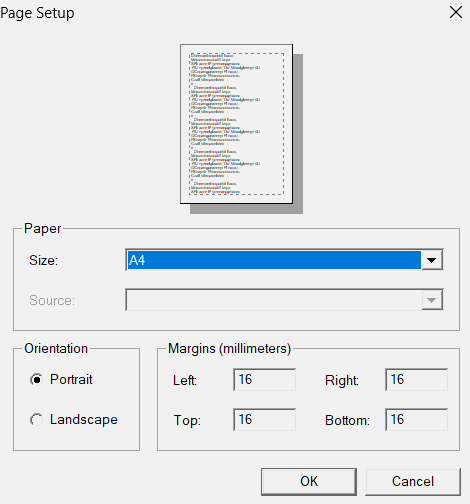
Fig. 50: Page Setup
[Printer Setup]:
Same as 4-9-3 [Printer Setup]. Users can set the printer to be used and related settings here.
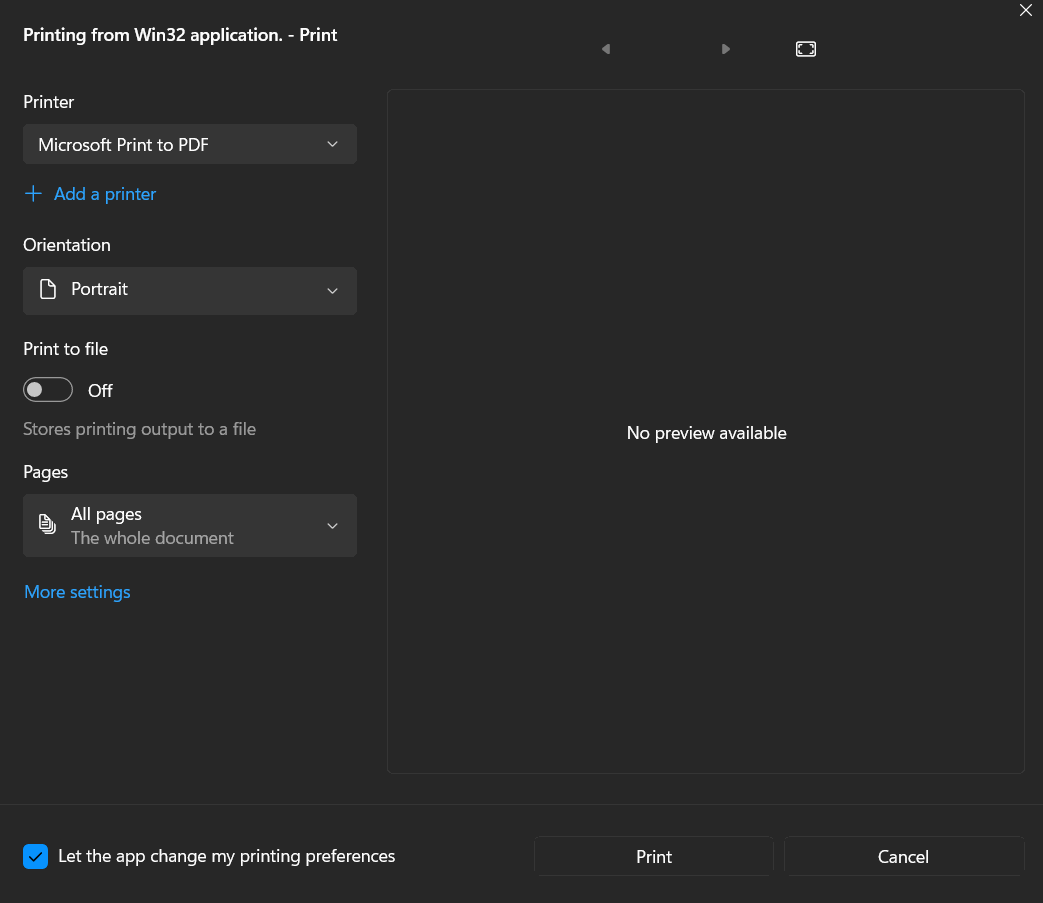
Fig. 51: Printer Setup
4-9-2 Print RTF File
Click [Print RTF File] to show a page almost same as [Print….]. Users can select the items which they want to print, and use [Move UP] or [Move Down] to change the display order.
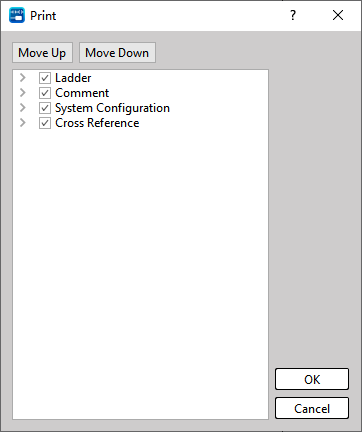
Fig. 52: Print RTF File
4-9-3 Print Setup
Users can set the printer to be used and related settings are shown below:
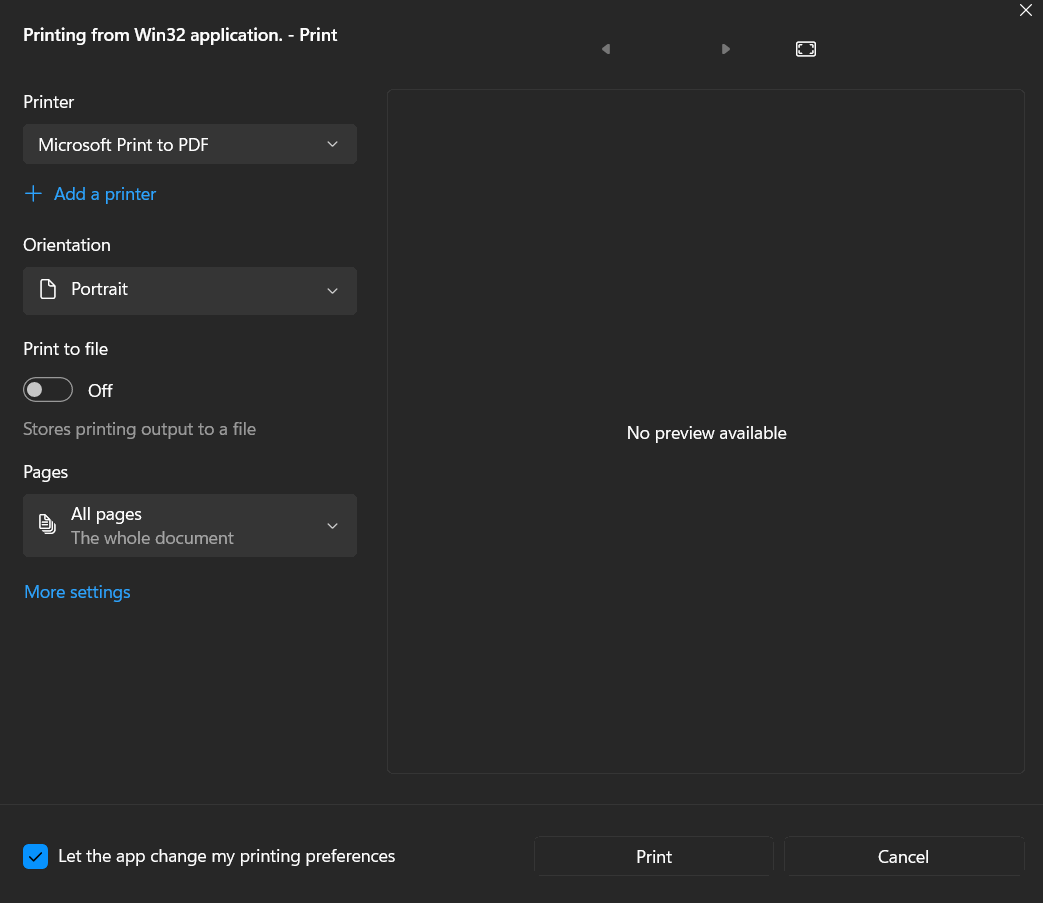
Fig. 53: Print RTF File
Tip: press ← → to switch chapters, Ctrl+K to search