Although the【Toolbox】provided by this software is able to meet the needs of most users, the objects provided in the 【Toolbox】are all pre-set and does not allow users to use objects that they changed on their own. The software also provides the【User Toolbox】function because not only does it allow users to access objects that they have modified, it also provides【Import】and【Export】functions so that the objects in the【User Toolbox】can be quickly transferred between different computers, speeding up development.
This chapter will explain【User Toolbox】related pages and their operating methods.
20.1 Basic Operations
Select the【User Toolbox】in the【View】page of the【Ribbon】and the【User Toolbox】will appear as shown in the figure below.
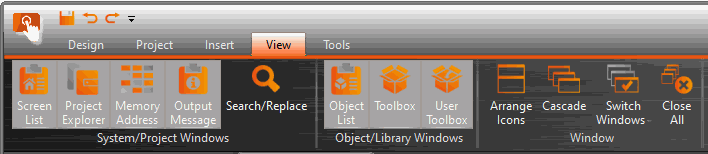
Figure 386 View page of the Ribbon
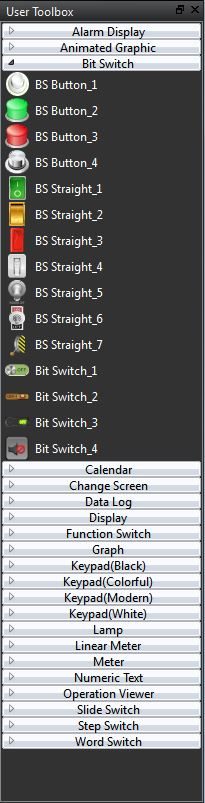
Figure 387 User Toolbox
The basic operations of the【User Toolbox】can be divided into three parts:
- Adding objects to the【User Toolbox】.
- Adding the objects in the【User Toolbox】to the【Work Space】.
- Introduction to menu operations.
20.1.1 Adding objects to the User Toolbox
Move the mouse cursor over the object in the【Work Space】to add to the【User Toolbox】, then press the ctrl key and left mouse button to start dragging the object. Drag the object into the【User Toolbox】and then release the left mouse button. The object will be added to the【User Toolbox】according to the location where the mouse button was released, figure as shown below.
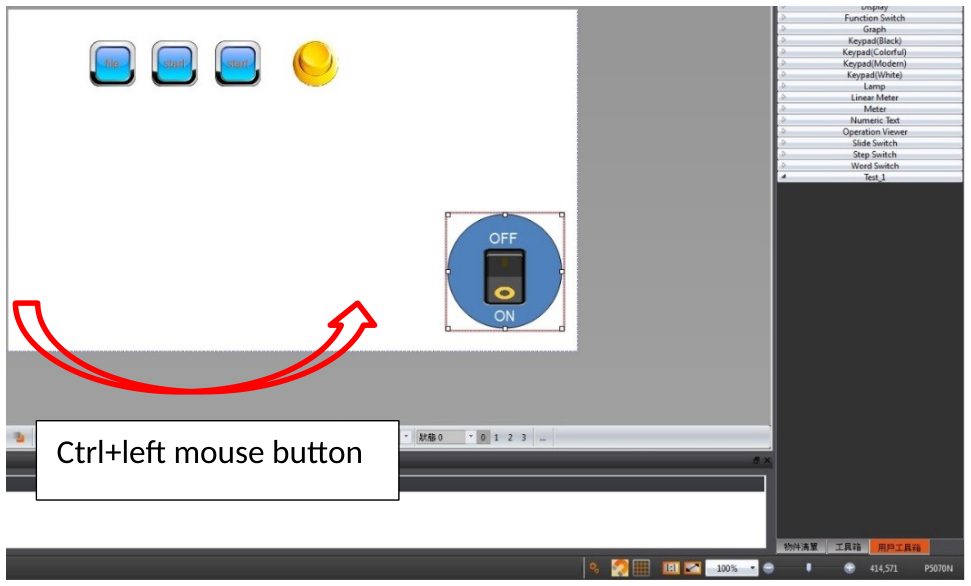
Figure 388 add object to【User Toolbox】
The default name of the added object is “category_number”, as shown in the figure below.
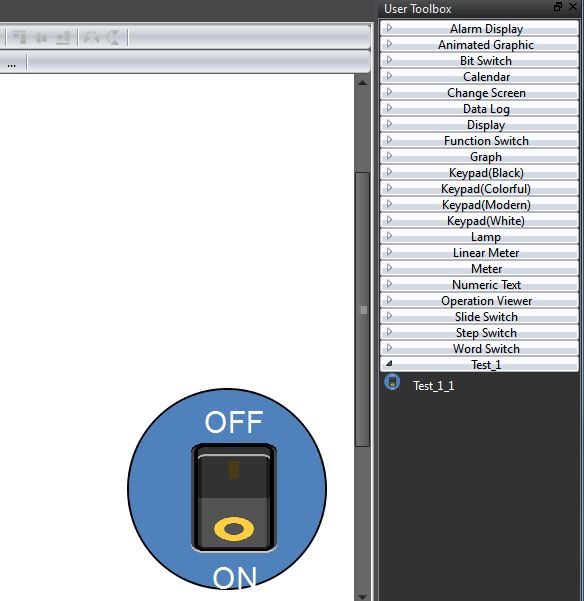
Figure 389 User Toolbox–Default name
If the left mouse button was released in the【Work Space】, the object will be added to the【Work Space】where the mouse button was released.
Note: The object names within the User Toolbox do not relate to the object names and comments in the work space.
20.1.2 Adding the objects in User Toolbox to the Work Space
Move the mouse cursor over the object in the【User Toolbox】to add to the【Work Space】, then press and hold the left mouse button to start dragging the object. Drag the object into the【Work Space】and then release the left mouse button at the location to add the object. The object will be added to the【Work Space】at the location where the mouse button was released, figure as shown below.
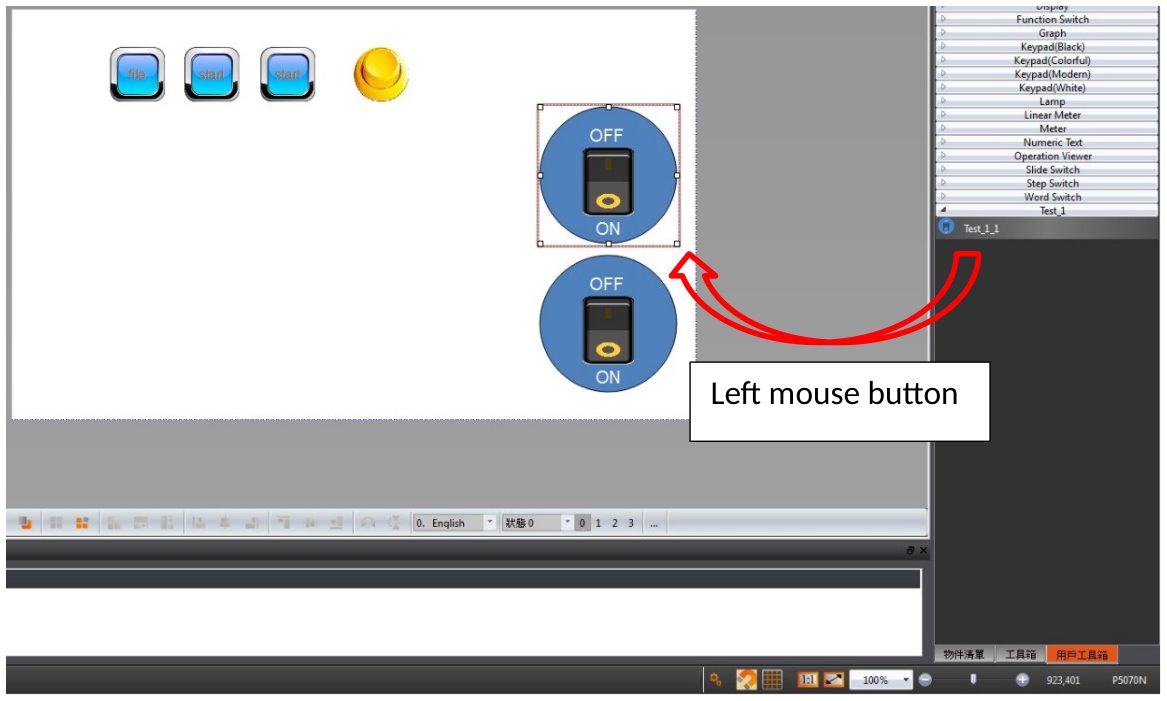
Figure 390 drag object from【User Toolbox】to【Work Space】
If the left mouse button was released in the【User Toolbox】, the object will be moved to the location where the mouse button was released so that the user can change the category the object belongs to and its location in the【User Toolbox】.
Note: If the text library, tag library or other settings are used by the objects in the User Toolbox, please remember to import the text library, tag library and other settings when adding the object in order to guarantee that the settings of the object during use are the same as the settings when it was added.
20.1.3 Menu Introduction
A【Menu】will appear when the right mouse button is pressed in the【User Toolbox】. The options within the menu changes according to the location where the right mouse button is pressed, as shown in the figure below. Options within the【Menu】are as listed in the table below.
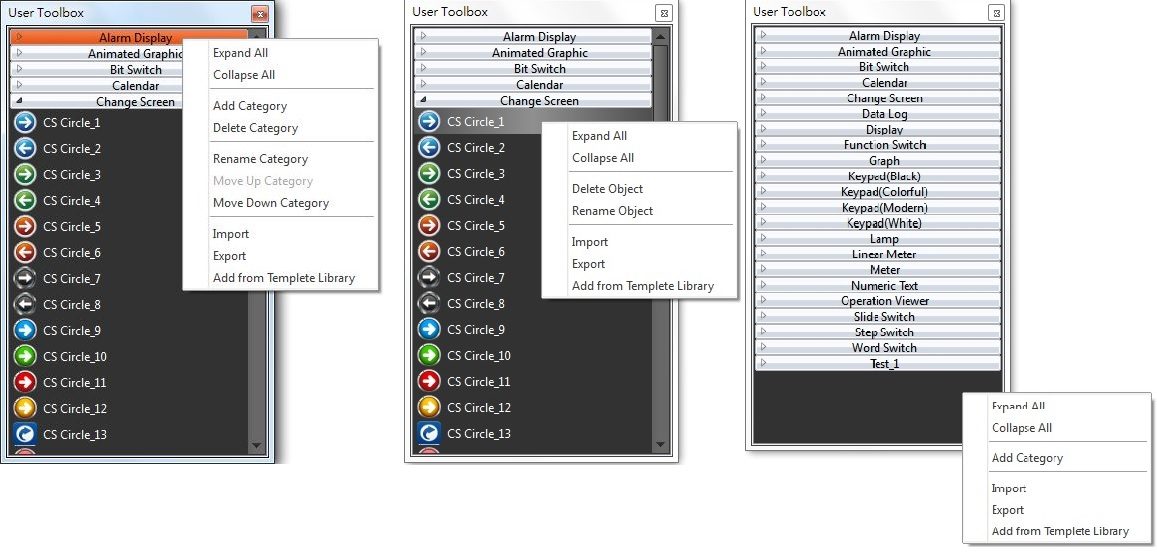
Figure 391 Menu–Mouse over category (Left); Mouse over object (Middle); Mouse not over category or object (Right)
Table 253 Options within the menu
|
Option |
Description |
|
【Expand All】 |
Expand all【Category】in the【User Toolbox】, allowing users to see all【Object】. |
|
【Collapse All】 |
Collapse all【Category】in the【User Toolbox】so that users cannot see the【Object】, just the【Category】. |
|
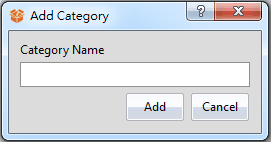
【Add Category】 |
Add a【Category】; the window below will appear.
|
|
【Delete Category】 |
Delete the selected【Category】along with all the【Object】in the【Category】. |
|
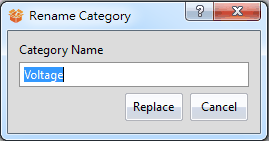
【Rename Category】 |
Change the name of the selected【Category】; the window below will appear.
|
|
【Move Up Category】 |
Move the selected【Category】up a level. |
|
【Move Down Category】 |
Move the selected【Category】down a level. |
|
【Delete Object】 |
Delete the selected【Object】. |
|
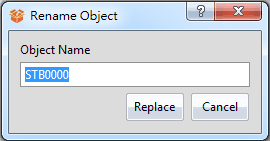
【Rename Object】 |
Change the name of the selected【Object】; The window below will appear.
|
|
【Add from Template Library】 |
Add a new object from the built-in template library. |
|
【Import】 |
Add the previously saved【User Toolbox】file (*.utf) into the current【User Toolbox】. |
|
【Export】 |
Save the current【User Toolbox】into a file (*.utf). |
20.2 Import and Export
In order for users to transfer the【User Toolbox】they are modified between the different computers, this software provides the【Import】and【Export】functions. This section will introduce how to use these functions.
20.2.1 Import
Press the right mouse button within the【User Toolbox】and select【Import】from the menu that pops up, as shown in the figure below.
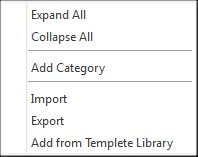
Figure 392 Menu–Import
The window below will appear. Select the file (*.utf) to import and then press【Open File】to import the file.
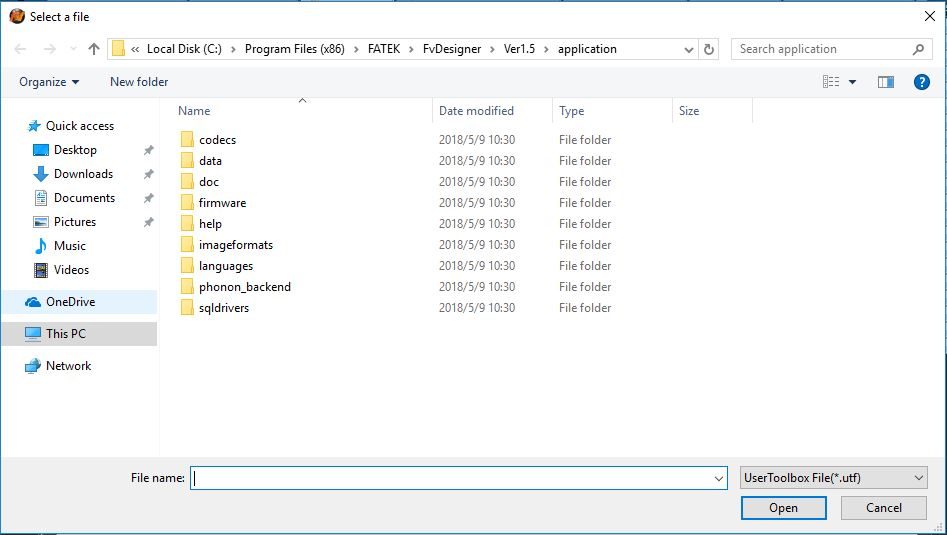
Figure 393 Select file to import
20.2.2 Export
Press the right mouse button within the【User Toolbox】and select【Export】from the menu that pops up, as shown in the figure below.
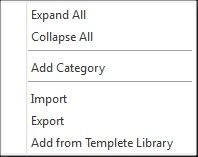
Figure 394 Menu–Export
The window below will appear; select the【Category】to export here, as shown in the figure below.
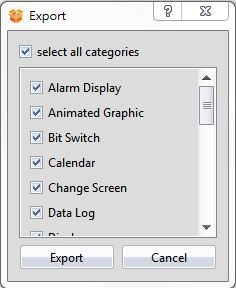
Figure 395 Select category to export
The window below will appear. Press【Save】after selecting the name and location of the file (*.utf) to export the file.
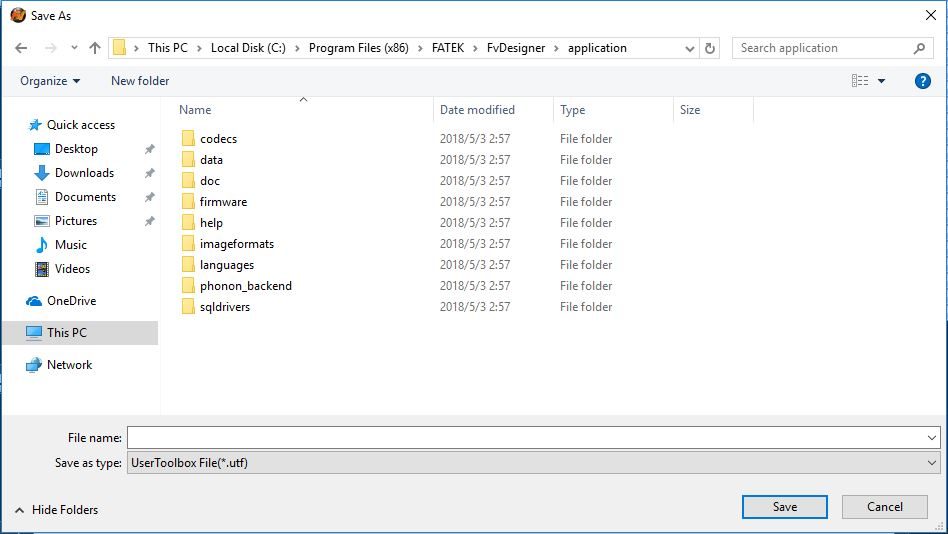
Figure 396 Select the name and location for the file export
20.3 Name Conflicts
Identical【Category Names】are not allowed in the【User Toolbox】in order to prevent the users from getting confused. Similarly, identical【Object Names】are also not allowed within the same【Category】. Therefore, when conflicts occur due to repeated names, the【Category Name Conflict】window or the【Object Name Conflict】window will appear according to the situation to help users solve this problem. This section will now introduce the pages related to the【Category Name Conflict】and【Object Name Conflict】windows.
Note: Identical object names are allowed if used in different categories.
20.3.1 Category Name Conflict
Occurs when there are identical【Category Name】during【Rename Category】or【Import】.
The following window will appear if they occurred during the【Rename Category】, notifying the user that this name has already been used, as shown in the figure below.
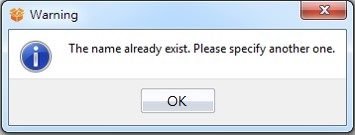
Figure 397 Repeated category name warning
The following window will appear if they occurred during【Import】, allowing the user to select what action to take next, as shown in the figure and table below.
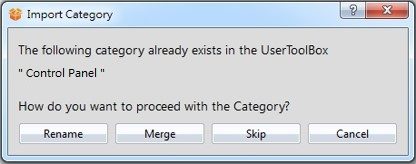
Figure 398 Category Name Conflict selection window
Table 254 Category Name Conflict options
|
Option |
Description |
|
【Rename】 |
Change the name of the category to import and then add it to the【User Toolbox】. |
|
【Merge】 |
Merge the category to import with the category within the【User Toolbox】. |
|
【Skip】 |
Skip and do not process this category import. |
|
【Cancel】 |
Cancel this import. |
20.3.2 Object Name Conflict
Occurs when there are identical【Object Name】during the【Rename Object】or【Import】.
The following window will appear if they occurred during【Rename Object】, reminding the user that this name has already been used, as shown in the figure below.
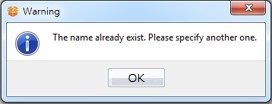
Figure 399 Repeated object name warning
The following window will appear if they occurred during【Import】, allowing the user to select what action to take next, as shown in the figure and table below.
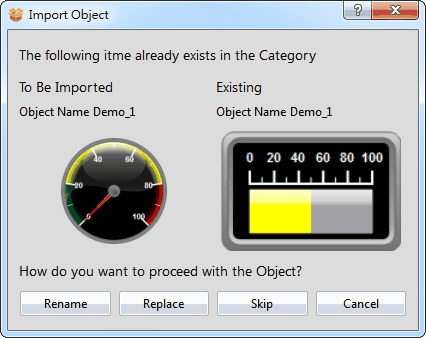
Figure 400 Object Name Conflict selection window
Table 255 Object Name Conflict options
|
Option |
Description |
|
【Rename】 |
Change the name of the object to import and then add it to the current【Category】. |
|
【Replace】 |
Replace the object in the current【Category】with the object to import. |
|
【Skip】 |
Skip and do not process this object import. |
|
【Cancel】 |
Cancel this import. |
Tip: press ← → to switch chapters, Ctrl+K to search